Search This Blog

Showing posts with label Recipe. Show all posts

Wednesday, August 15, 2012

Basil!

If you grew basil in your garden this year, chances are you have A LOT right about now.  I love basil and grow it every year.  After adding it to every recipe I make in the summer I always still have a lot growing in the backyard.  Here are some things to do with it so you have have "fresh" basil all winter. 

1. Freeze it
I have an ice cube tray specifically for basil so my normal ice does not taste like basil.  Pack as much washed and cut basil as you can into the cubes.  Fill the rest of the way with water and freeze.  As soon as the cubes are frozen, empty into a freezer safe bag.  You can just throw these cubes into anything you want, or melt them in a bowl and take the basil out if you don't want the water. 

2. Make Basil Butter
One of my favorite things to do with Basil.  You can use this for sauce over pasta, on bread then broiled, served with rolls, in sauces with veggies, or on meats.  I usually make a lot when I do this because it's just as easy to make a ton, and you only have to wash up once. 

3c basil          4 cloves garlic
1lb butter       Fresh ground pepper

Throw it all in the food processor and blend until smooth.  Transfer to an airtight container or make balls with a small ice cream scoop.  Put balls on a cookie sheet and place in the freezer.  Once frozen transfer to a freezer bag and freeze to use all winter!  Not only are they delicious, but they are pretty too!

3. Grow more
I have not tried this yet, but it worked for my mom!  Put a sprig of basil in water on a windowsill and it will grow roots. This way you can have a small plant in the house all winter.  I think I will try it, even though it will be hard not to use it all at once!

Let me know your favorite thing to do with basil!

Thursday, July 19, 2012

Buffalo Chicken Enchilada Recipe

 
I got this recipe from the Pillsbury Casserole book.  I don't usually make things with so many pre-made ingredients, but this is delicious.  Make a lot because it is even better left over!  I shred my chicken, but if you don't have the time you can cube it like the original recipe says.  This time I used wheat tortillas to make it a little heathier.  I usually end up buying the larger tortillas, so I make less than 12 or make more of the fillings. 


Serving size is 2 enchiladas, makes 6 servings
3 cups cooked chicken
3/4c Buffalo wing sauce
1 cup sour cream ranch dip
3 cups Cheddar cheese
1 can cream of chicken soup
green onions
12 - 6" tortillas


Grease a 13x9" pan and preheat the oven to 350.


To make shredded chicken, boil a pot of water and add chicken.  Cook for about 20 min or untill the chicken is not pink inside anymore. Take it out and shred with a fork holding the hot meat with tongs or another fork. Stir the chicken into the wing sauce.  


In a seperate bowl mix the soup, dip, and onions together to make a sauce for the inside of the enchildas.  Save a good amount of the sauce for the top so the tortillas do not dry out in the oven.  I set up a station to make filling each tortilla quick and easy.  Save some of the cheese for the top also.  Once filled, roll each tortilla and place seam down into the pan.  Spread the sauce on top when pan is filled then cover with aluminum foil.  Cook for 35-40 min or until hot and bubbly.  Take the foil off, add the cheese, green onions and cook for another 5 min.  Serve warm with a side of hot sauce!  Start to finish this dish takes a little while, but the chicken could be cooked the night before.  The enchiladas could even be put together ahead of time and kept in the fridge.  All in all, this is a fairly easy dish for how good it is!

Tuesday, July 17, 2012

Product review and Recipe - Peach Sorbet


July is National Ice Cream month, it's also TBG's Birthday.  He got the Cuisinart Ice Cream maker for his birthday so we will be reviewing it here and sharing the recipe.  One if his favorite fruits is peach, so I decided to make the Raspberry Sorbet from the recipe book substituting peach for the raspberry.  I chose sorbet because I already had the ingrediants in the house, and it seemed like the easiest.  If it doesn't come out I can say for sure it wasn't the recipe!


Peach Sorbet

Serving size 1/2c, makes 10 servings

2 cups water
1.5 cups sugar
pinch of salt
4 cups frozen peaches, thawed
I started with making a simple syrup in a medium saucepan.  Add the syrup to the fruit with the salt.  I then used the immersion blender to make a smooth mixture.  After transferring to a airtight container I refrigerated for 2 hours.  Make sure the freezer bowl is completey frozen.  Then turn the machine on and pour the fruit mixture in the top.  The frozen treat starts to pull together and freeze almost immediately.  Mix for 15-20 min and voila!  Sorbet!  If you want it thicker, throw it in the freezer for an hour or so.  The first time I tried to make sorbet, I only froze the bowl for 7 hours.  I shook it and it sounded frozen, but my sorbet never froze, or got any thicker.  Fail!  I put it in the freezer anyway, but it never really got a nice texture.  This time I had the bowl in the freezer for a couple days.  The book does recommend keeping it in the freezer at all times so you are always ready for a frozen treat.  The machine itself is very easy to use.  The bowl is not big, but big enough for a family.  If I was making ice cream for a party, I would start a week early, or buy another bowl.  An extra bowl is $30 on cusinart.com.  I can't wait to try something more difficult like frozen yogurt or ice cream!

Thursday, April 5, 2012

Fried Rice


There are a couple recipes I make when I don't know what else to make. One is fried rice, TBG's fave.  I am not Asian, and have never taken a cooking class or anything else so this is just my version.  I love to have leftovers for work so I make a lot when I make it. I also have a really big skillet which helps.  I have never tried to make this in a wok or anything else.  I have tried to make this healthier with brown rice but it's just not as good.  I have also used low sodium soy sauce, but ended up just using more.

Serves 4-5

4c white rice (better if it's leftover or sits on the stove awhile)
2 tbls canola oil
1 tbs sesame oil (optional)
3 cloves garlic (I use more, but we really like garlic!)
1-2 tbls grated ginger depending on your taste
5 eggs
1 large chicken breast
1-2 c of whatever veggies I have around; peas, baby corn, carrots, zucchini, mung bean sprouts...
soy sauce (I use almost a whole bottle every time)


Heat the canola oil, add garlic and ginger.  Tip: freeze the ginger to make grating easier. Saute for 1-2 min then add chicken. While the chicken is browning add the sesame oil if using, and about a tablespoon of soy sauce. If using a veggie that needs cooked longer like carrots or zucchini add now too. I usually add the peas or bean sprouts right before the rice. When everything is cooked add the rice and stir well. If the rice looks dry you can add more oil or a couple slabs of butter. There are two ways to do the eggs, you can scramble them then pour them into the rice, or break them into the pan then scramble. I do not like to dirty extra dishes so I move the rice to the side then break and scramble the eggs right there. Really up to you. Add enough soy sauce to make the whole thing wet, stir well. Let cook another 1-2 min then serve with more soy sauce. TBG also adds Sriacha if you like it spicy.


Hope you enjoy, leave me a comment if you have any questions.  Thanks!

Tuesday, January 31, 2012

Cupcakes!

Ever since I got my Kitchen Aid a year ago I have been making lots of cupcakes.  I don't have the confidence yet to come up with my own, but I thought I would share a few of my favorite recipes.
Big Breakfast!
The most popular, and the beginning of it all is the French Toast.  When I tried the Big Breakfast from Main Street Cupcakes I knew I had to figure out how to make it.  I found this from Life is better with cake. These are pretty easy to make and everyone loves them.  This recipe makes about 12 cupcakes.  I use maple syrup for the frosting so I don't have to buy maple extract.  NOTE: 1c Cake flour = 1c - 2tbsp all purpose flour + 2tbsp cornstarch.
Soo Pretty!  (photo from Brown Eyed Baker)
Next is the Limoncello cupcakes from Brown Eyed Baker.  They are filled with lemon curd.  These are a little bit more work but soo worth it.  They are better the next day after all the lemon has mellowed and really seeped into the cupcakes.  Perfect for a refreshing summer snack.  We make our own Limoncello so this is a great way to showcase this great drink.


Another, more recent find (thanks to Pintrest!) is the Cookie Dough Cupcake!  Who doesn't love cookie dough??  These cupcakes are even better than I expected.  They take a little while to make, but aren't hard.  There is a ball of (safe to eat) cookie dough in the middle!


Any recommendations for cupcakes I should try??

Saturday, December 10, 2011

Bacon Chocolate Chip Cookies


These cookies sound strange at first, and people give me strange looks when I tell them there is bacon in the cookies, but trust me they are great.  Even if you do not particularly like dark chocolate, use it
anytime you want to combine chocolate and bacon, trust me on this one.

Makes 2 doz cookies
Ingredients: 1/2 c butter               1 tsp vanilla extract
            1/2 c sugar                1 1/8 c flour
            1 egg                      1/4 tsp salt
            1/2 tsp baking soda        8 oz dark chocolate chips
            1/2 lb bacon, crispy          1/2 c brown sugar

Melt butter in a small pan.  While it is hot add both sugars.  Stir, then let cool a bit.  If it's too hot it will melt the chocolate, but you don't want it to cool so much it turns solid again.
 
Mix the flour, soda, and salt in a mixing bowl.  In a small bowl lightly beat the egg and add vanilla.  Then add to the butter mixture.  Stir well then add to the flour mixture.  Stir well then add the chips and chopped bacon.  You may want to add more chips or more bacon depending on how you like it.  I like less chips and more bacon.  Put into the refriderator for about an hour. When ready, preheat the oven to 375 degrees.  I use a small cookie scoop to put small balls on my parchment paper covered cookie sheet.  Bake for 7-12 minutes depending on your oven.  Take the cookies off the cookie sheet and cool completely, or eat warm. :)  Either way, Enjoy!


Saturday, November 19, 2011

Easy Tuna Pasta Salad - Recipe


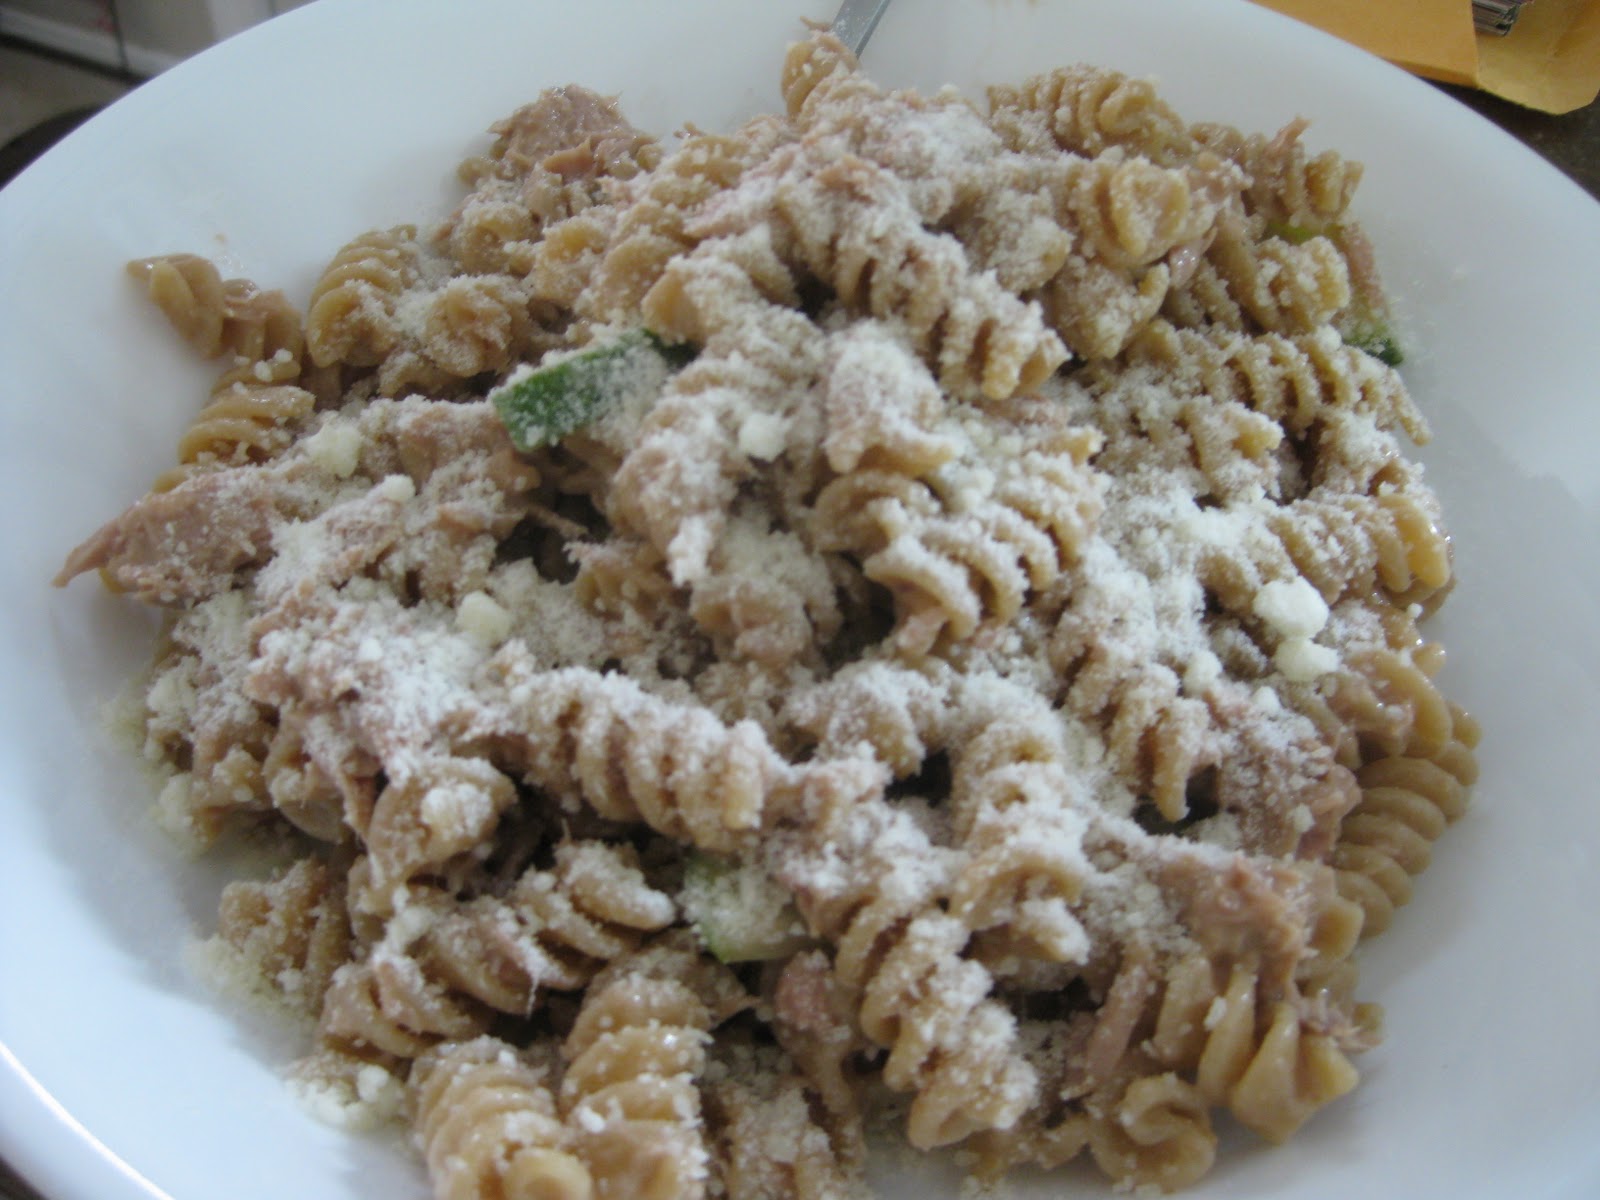
I like to have a staple of weeknight meals to always have the ingredients on hand and whip it up after work.  This is one of those meals.  Almost all of my staple meals have pasta, but TBG like to eat a protein so I added tuna to this pasta salad.  Albacore tuna really is the best for this and makes great leftovers.  I use canola mayonaise and wheat pasta because it is healthier.  This time I put cucumbers because they were in season and growing in our garden, but most of the time I use peas.  First I drained two cans of tuna (and gave my cats their share) then put it into a large bowl.  Then I mixed in the mayo, sriracha, and balsamic vinegar.  I use enough mayo to cover the pasta, but not so much that it's like a sauce, about 3/4 cup for a box of pasta.  You don't want it really heavy on the mayo so sometimes I use italian dressing to cut it down instead of balsamic vinegar, whatever you have on hand.  Use as much sriracha as you are comfortable with.  TBG likes a lot so I put about a tablespoon.  When the pasta is cooked al dente rinse with cold water.  Add cold pasta to the tuna mixture and toss well.  I topped with parmasan cheese to add a little saltiness.  I tend to make a lot so I can take for lunch the next day too.  Enjoy this easy weeknight recipe!

Tuesday, August 9, 2011

Recipe - Summer Grilled Veggie Sandwich


I am going to try including recipes on this blog. (I promise I will try to learn to take better pics!)  Let me know in the comments if this is something you would like to see more of.  I get tired of eating the same things on the grill all summer. So, this night I wanted to try something different while still taking advantage of the nice day and being able to cook outside.  I also like to create recipes that use mostly ingredients from my garden.  This year I have been having trouble and had to purchase most, but hopefully you are having better luck than me!  I bought a large crusty loaf of french bread, baby eggplant, small zucchini, large tomato, goat cheese, and spinach.  You can put whatever veggies you enjoy eating on this sandwich.  Red bell pepper and onion are good on the grill, as well as summer squash.  Cut the veggies long to make it easier to grill and to fit perfectly on the sandwich.  This makes for fewer cuts and a fast prep time.  The tomato needs to be cut thick to stay together on the grill.

I also used olive oil, fresh garlic and basil, cracked pepper and sea salt which I always have on hand.  I cut the basil, chopped the garlic, ground the pepper and salt and added all to the olive oil in a flat bowl.  Other fresh herbs could also be used in this oil but I like to keep it simple.  I used the oil mixture to soak the veggie so they do not burn on the grill.  I used to brush the oil on, but found this soaking to be a better method.  It was easier and we didn't have to add more oil while it was cooking.  Save the remaining oil for the sandwich.  I used about a half cup of oil for our 3 sandwiches.


I sent TBG out to grill the veggies.  You have to be careful with the tomato but when done it comes out beautiful.  In the house I cut the sandwiches from the large loaf, I like that I was able to cut the sandwiches to whichever size I wanted.  I made TBG's bigger than mine and got about 3 sandwiches out of the loaf.  Spread the olive oil mixture on the bread.  I tried to use a lot because the bread soaked it up, the more you use the messier the sandwhich is, but TBG and I have never been bothered by a messy sandwich!  Next spread on the goat cheese.  Sometimes this isn't easy to spread but try to get a good thick layer.  I used about 3/4 of the small log.

After TBG brought the veggies back I added them to the sandwiches and finally topped with the spinach.  The tomatoes fall apart easy, but as soon as they are on the sandwich they add a great flavor and some more moisture.  We both really enjoyed these sandwiches, TBG even went up for seconds.  I will definately make again, and they would be perfect for entertaining on a relaxing summer day.  I did not show a side dish for this, but it can be enjoyed with a side of chip(p)s of course :)